drawing pipe in autocad 3d
We have taken a adept time lately working on mastering the basics in AutoCAD, and with this skill, you must be able to replicate whatever 2d images using AutoCAD.
Every bit you must take noticed from our by experience, learning AutoCAD goes first with understanding what the environment is made of, How to draw basic shapes, and finally how to combine all the basics to create complex designs.
AutoCAD 3D tutorials:
AutoCAD 3D how-to tutorials
- 3D AutoCAD drawing
- Subtraction of objects in AutoCAD
- 3D Intersection in AutoCAD
- How to unite 3D objects in AutoCAD
- Drafting a 3D rectangle
- Shell in AutoCAD
- Save your life with the SPHERE command in AutoCAD
- Sweep in AutoCAD
- 3D rotate in AutoCAD
3D Projects (Good 3D practice exercises)
- 3D Design projection for beginners – AutoCAD
- AutoCAD 2nd to 3D
- An easy Modeling 3D project
- 3D Design projection for beginners – A Stool
- 3D design project for Beginners – A table
- CAD projects for Beginners – Tinkercad
- Revolve AutoCAD
- How to assemble with Tinkercad
- Beginner's tips – Autodesk Tinkercad
- Design a mechanical part with Autodesk Tinkercad
- Modeling with AutoDesk Tinkercad
AutoCAD 3D features
Before diving into creating your commencement 3D drawing in AutoCAD, I would similar to throw the following.
AutoCAD is primarily for generating 2nd sketches. It does have some ability to visualize those 2d sketches in 3d, and even to make 3d objects, but it's primarily built around a apartment, sketch-based workflow. If your invention is fundamentally two-dimensional, or made of trivially interlocking 2nd parts, AutoCAD might be the right affair.
Inventor is for 3d product design. It'south a professional piece of software and takes quite a bit of time to larn, but that's also true of its direct competitors. Information technology's currently Autodesk's about powerful tool for mechanical design. I tin't give you lot a coherent characteristic comparison to SolidWorks or Creo because I don't know them well plenty; I do know that SolidWorks is more popular. Inventor is 2nd, I think.
We practice accept a fairly new production called Fusion 360. It's built on the same modeling kernel as Inventor, and has better gratuitous form modeling. It'due south designed to be an all-in-one packet for product design by hobbyists and small businesses. Nosotros focused on making the user interface equally like shooting fish in a barrel to learn equally possible. Information technology's still quite a new product, and gets updates every few months, partly based on user feedback from its forum. A major advantage is that it's free until y'all start making coin with information technology, and even subsequently that it'due south pretty inexpensive.
Adam Helps ( )
No demand to elaborate further, only be aware that there are some industries (like Structural Design, Ceremonious engineering science) where AutoCAD is the preferred CAD software for 3D creation.
Surface Modeling and Solid Modeling
While talking most AutoCAD Drawing and CAD, information technology is of import to know the difference between Surface Modeling and Solid Modeling.
Surface modeling CAD (Blender, Sketchup, Rhinoceros, Maya) deals with manipulating the curves and surfaces of a model. Information technology's more costless form and generally done past clicking and dragging the surface/curves around to your liking. Information technology's platonic for architects, jewelry design, or annihilation you want done aesthetically.
Solid modeling CAD (Solidworks, Inventor, ProE, SolidEdge, GeoMagic) deals with adding dimensions and constraints to a 3d model. It is "parametric" meaning you can ascertain the shape and later edit. This is very essential for engineers since blueprint changes are always happening. Groovy for mechanical parts that require constant iterations. Some solid modeling CAD can perform surface modeling but it'southward a nightmare.
gyronictonic from reddit.com
AutoCAD 3D modeling 101
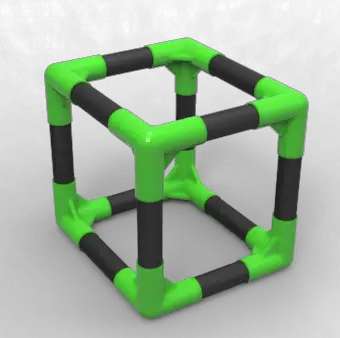
The following image shows yous an overview of what the object is made upwards of.
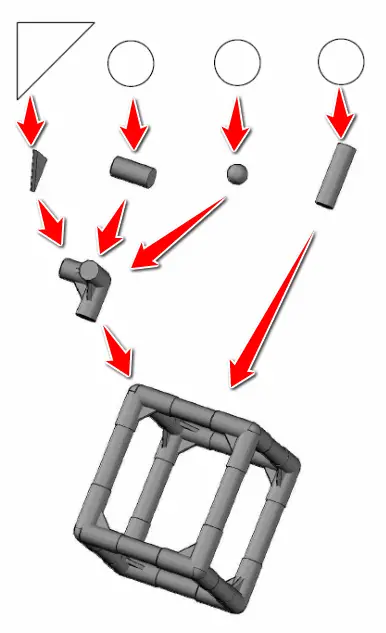
All objects are arranged like this

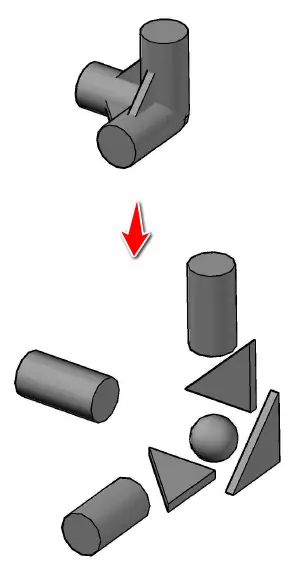
The elbow:
Creating basic 3D AutoCAD drawing
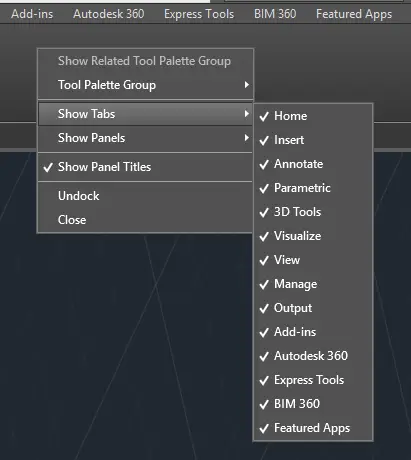
Before fully diving into this, yous should make sure all tabs are activated. (Right-click to show the menu)
Creating a Cylinder
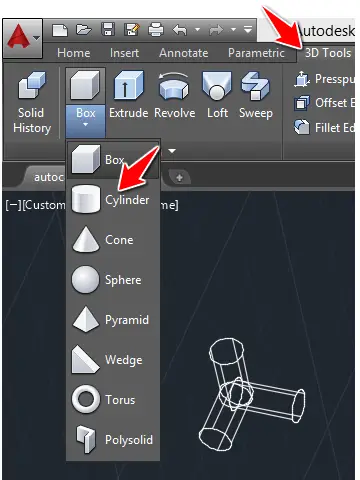
To create a cylinder
- Click on Cylinder
- Specify the center of the base
- Specify base radius
- Specify the pinnacle of the cylinder
Other routes you can use to create a cylinder are the post-obit.
Using the EXTRUDE command
- Create a Circle
- Utilize the extrude command to obtain the cylinder
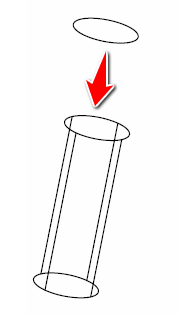
To do that
- Create a circumvolve the manner we learned
- Blazon EXTRUDE and press ENTER
- Select the circle and printing ENTER
- Specify the height of extrusion
Using the Revolve command
- Create a rectangle
- Apply the Circumduct command to obtain the cylinder
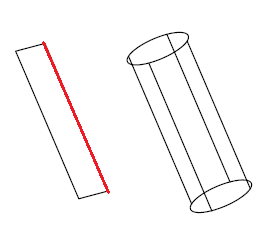
To do that
- Create a rectangle using the RECTANGLE command
- Type REVOLVE and Press ENTER
- Select the rectangle and Press ENTER
- Select one of the ends of the blood-red line shown on the image above
- Select the 2d finish
- and press ENTER
Using this method, you lot tin can at the last step decide not to shut the cylinder, meaning you will have to enter an angle value less than 360 before pressing ENTER.
Creating a sphere
To create a sphere
- Click on sphere
- Specify the center of the sphere
- Specify the radius of the sphere
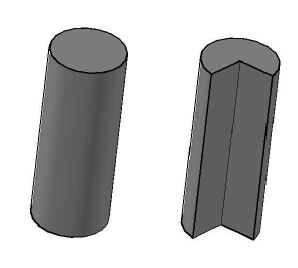
Create the last piece of that elbow
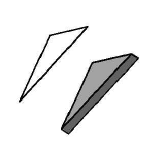
Simply create a triangle and extrude it. (utilize the POLYLINE command to create the rectangle). Yous tin can also use the WEDGE command to create it.
Nosotros have pretty much created all basic 3D objects we need, now we need to create copies, rotate them and assemble everything.
Nosotros have seen quite a number of new techniques here today, Nosotros will be coming back for the second part of this, where we will deal with some commands like UCS, UNION, Decrease, INTERSECT and testify you lot how to assemble the whole to create our final design.
Source: https://tutorial45.com/first-3d-autocad-drawing/
0 Response to "drawing pipe in autocad 3d"
Post a Comment